Creating a User Account
LEA Administrators are authorized to create user accounts within their local education agency. Accounts created will have the email address as the username. A user account can be associated to multiple LEAs but association to the LEAs will be done by the respective LEA Administrators of each LEA.
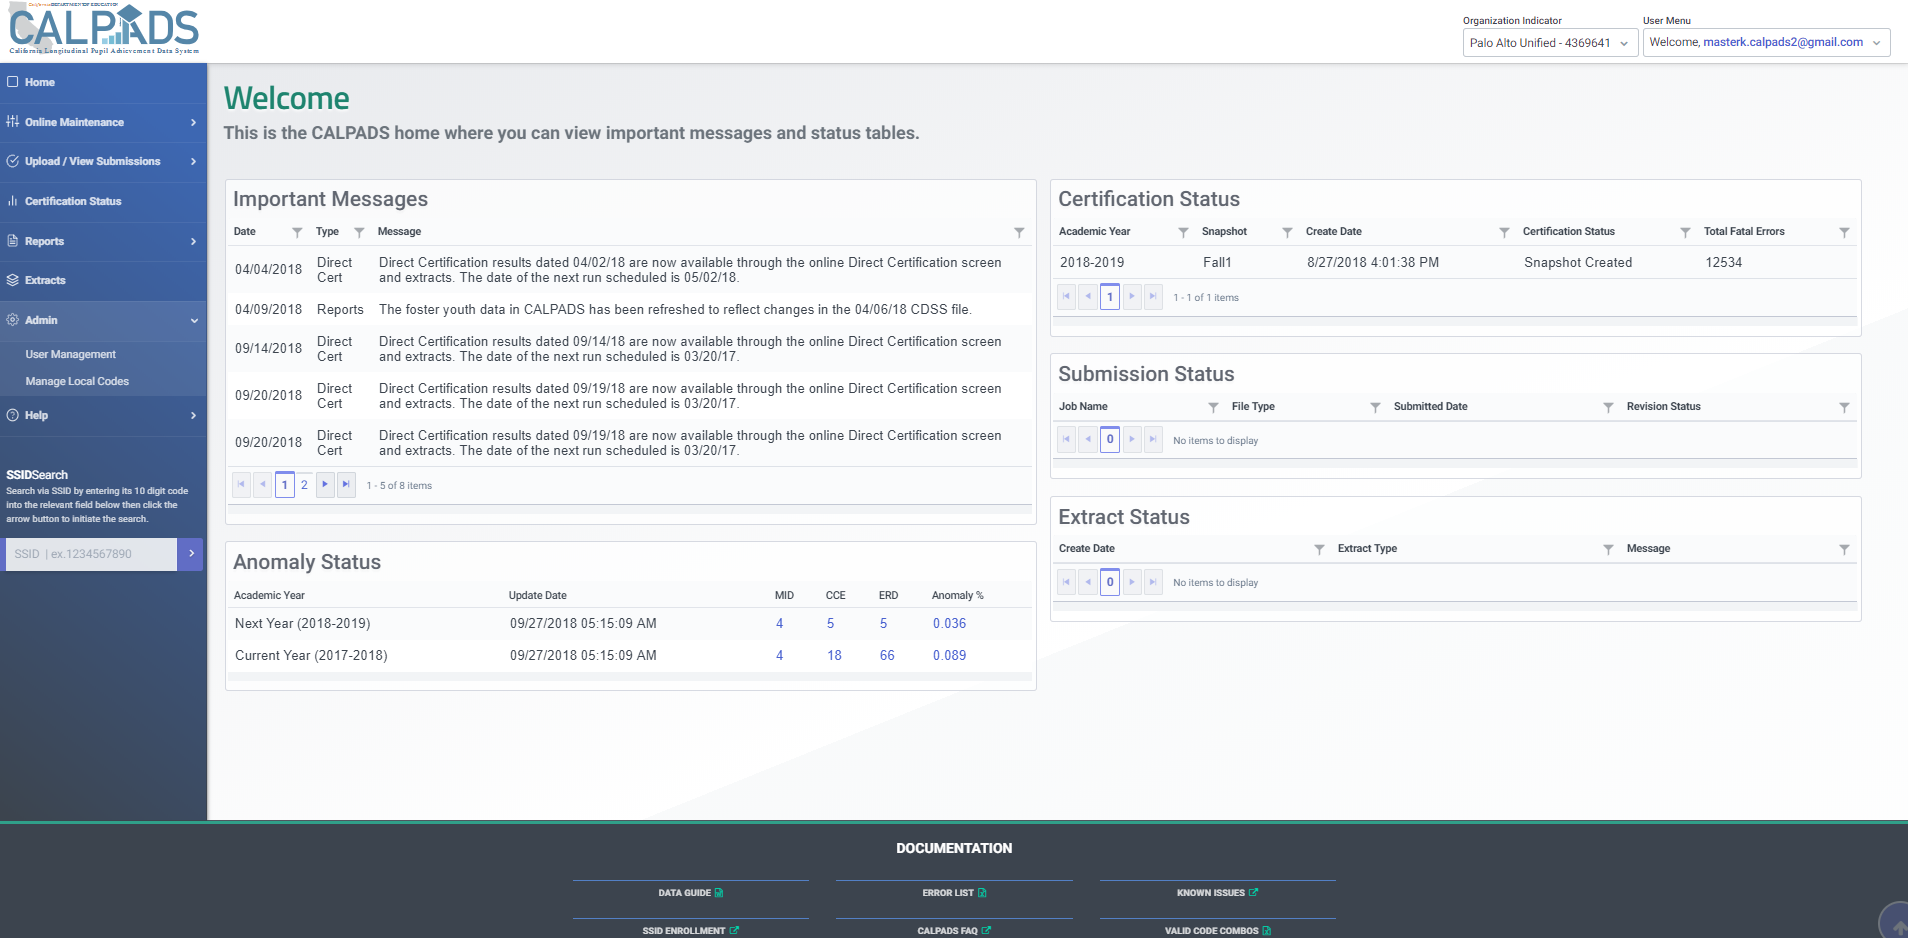
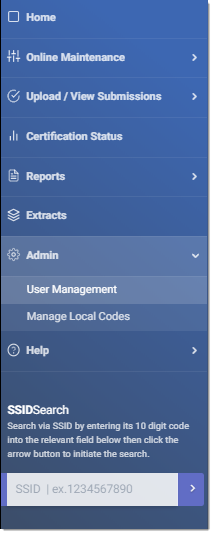
LEA Administrators log in to CALPADS and clicks on the Admin link from the Left Navigation panel and then clicks on User Management.
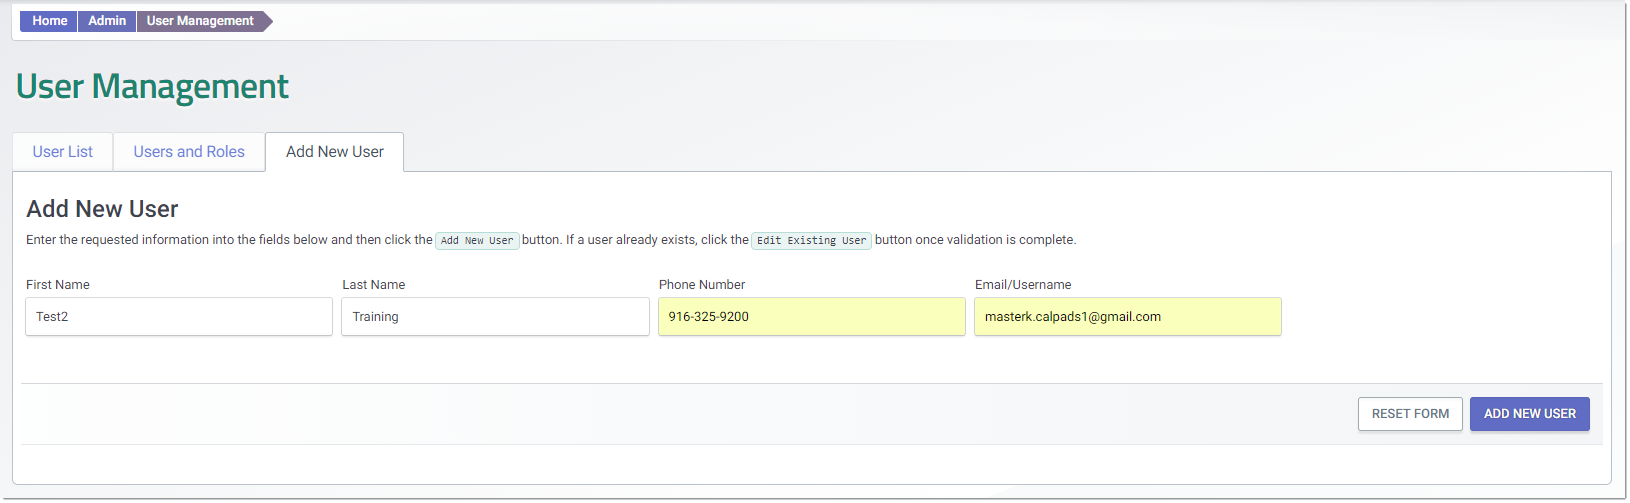
Step 1. LEA Administrator is directed to the User Management page. Click on the Add New User tab.
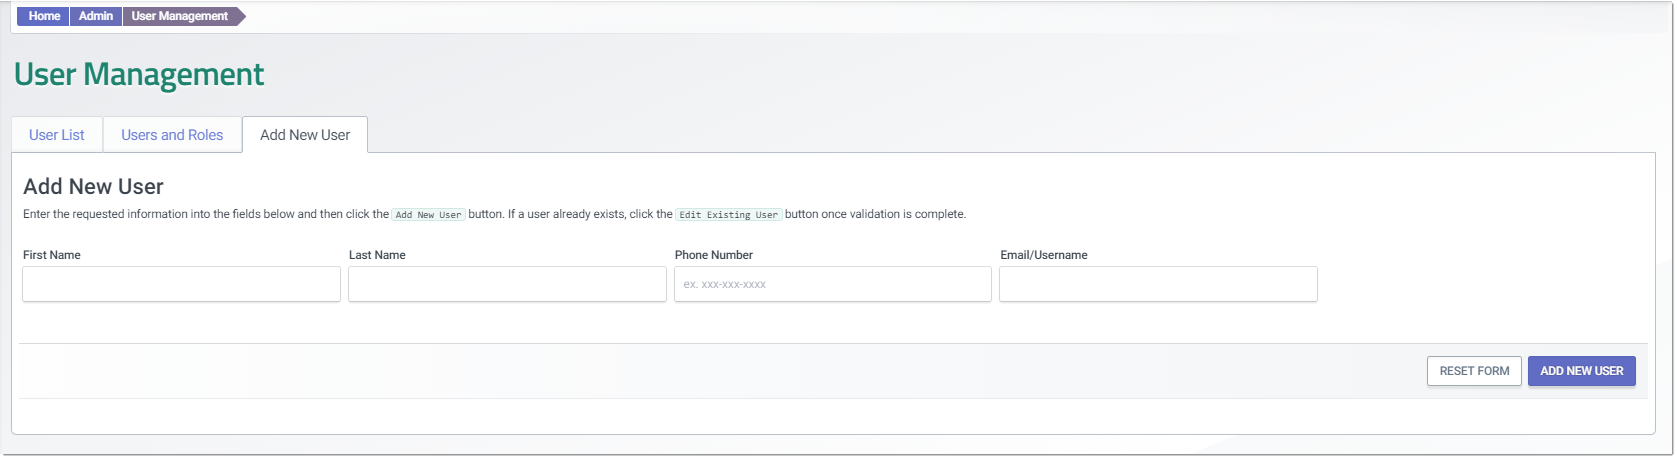
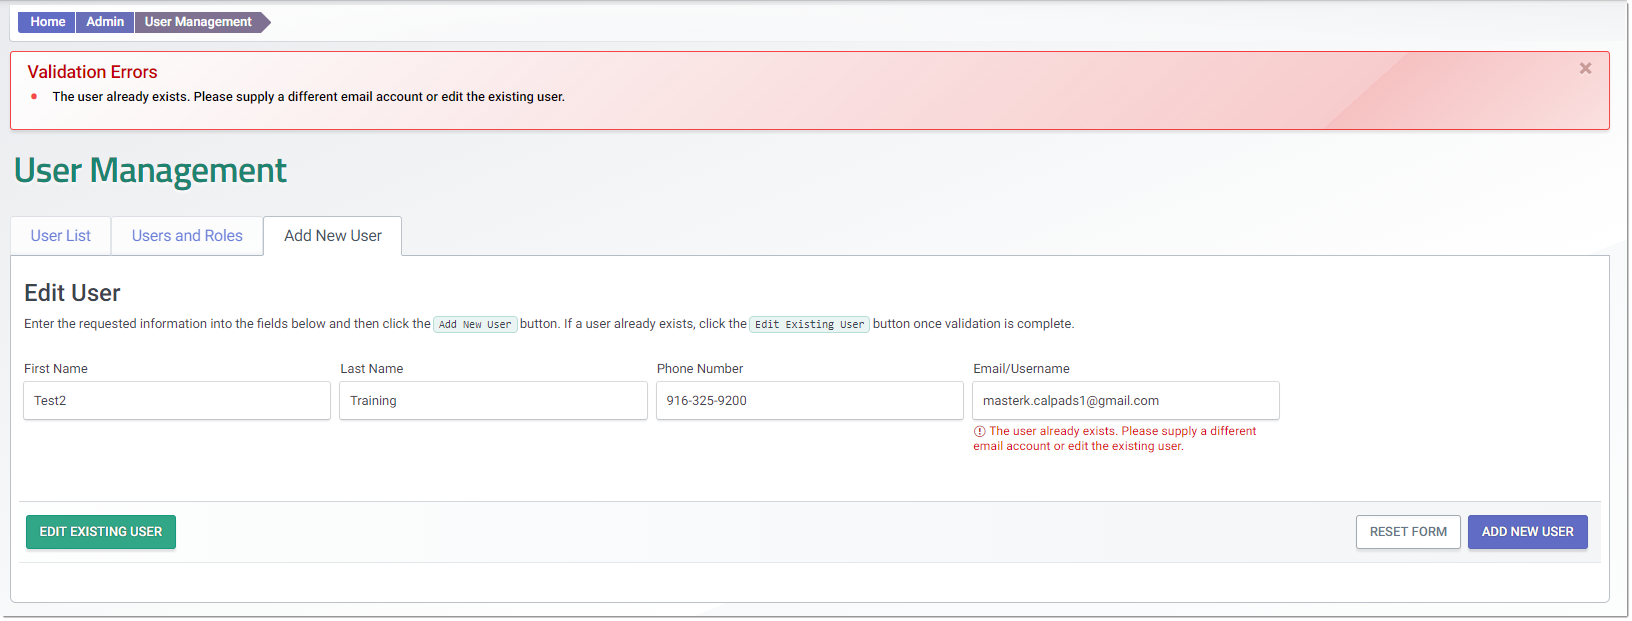
Step 2. Enter values on all fields. Please make sure the email address is accurate since this will be the Username for the account. Click on the Add New User button.
Step 3. If the email address already exist in CALPADS, a validation error will appear notifying the LEA Administrator about it. The LEA Administrator will be prompted to edit the existing account in CALPADS.
Step 4. If the email address does not exist in CALPADS yet, the LEA Administrator is notified that the User Profile has been saved. Click on Assign Org button next to associate the user account to the LEA or school.

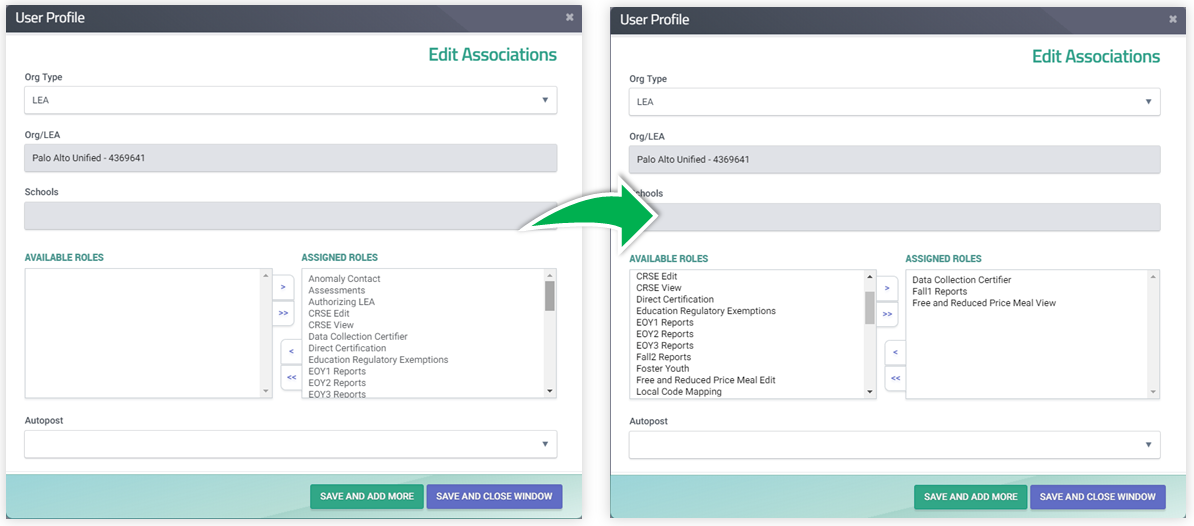
Step 5. Assigning organization. Once the user profile is saved in CALPADS. LEAS will need to associate the user account to their LEA by clicking on the Assign Org button.
There are two types of accounts determined by the Organization Type selected which limits the level of access for a user. The organization types are LEA and School. Depending on the organization type selected, some fields may be inactive. Therefore only limited fields are required in as indicated by the asterisk shown in Step 5-A or Step 5-B.
Available fields:
-
Org Type: Limits user access to CALPADS for entire LEA or selected schools within LEA.
-
Org/LEA: Drop-down field that enables LEA Admin to assign an account to the LEA.
- Schools: Enables LEA Admin to assign an account to a specific school or multiple schools within LEA. This field is active when Org Type selected is School.
- Available Roles: Grants the users access to specific data and functions in CALPADS.
-
Autopost: Depending on the selected option SSID records may automatically post records without allowing submitter to review data upon posting SENR file.
- Off - Functionality is disabled. User will have to manually processed each SENR record submitted in the file.
- New ID - Automatically Post SENR record with no match.
- Single Exact Match - Automatically post SENR record with single match.
- Both - Automatically post SENR record with no match and/ or with single match.
-
Step 5-A Assigning organization for LEA level account
 ]
]
- Step 5-B Assigning organization for School Level account.
 ]
]
Assign all desired access and functionality and then click on either the Save and Add More or Save and Close Window buttons. Save and Add More button enables the LEA Admin to assign more schools to user with school level account without leaving the Edit Associations window.
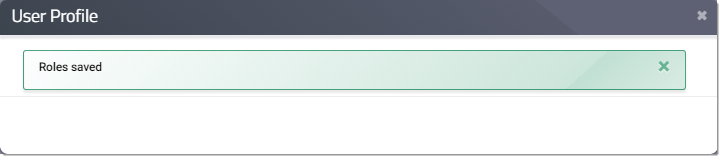
Step 6. LEA Admin receives confirmation that the Roles have been added.
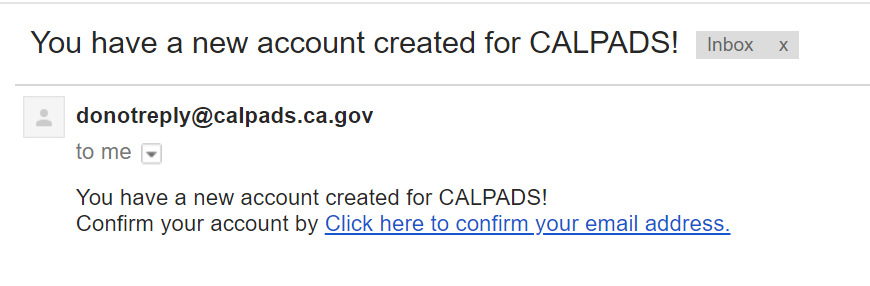
Step 7. User receives email notification that a CALPADS account was created for them and is prompted to click on the link to confirm email address.
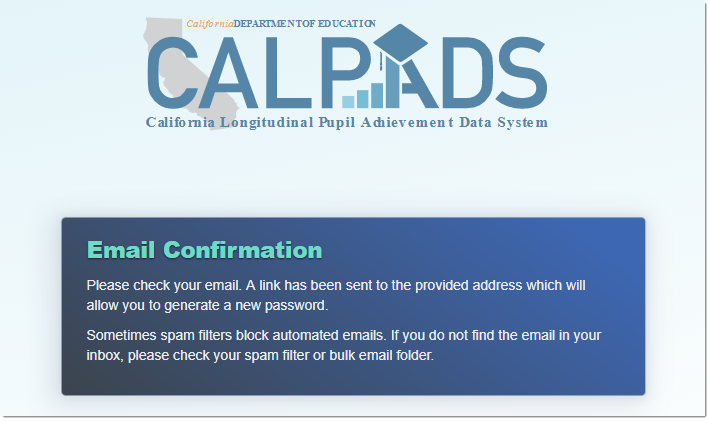
Step 8. An email confirmation message appears upon clicking on the link from the email message. It also notifies the user that another email was sent to generate a password.
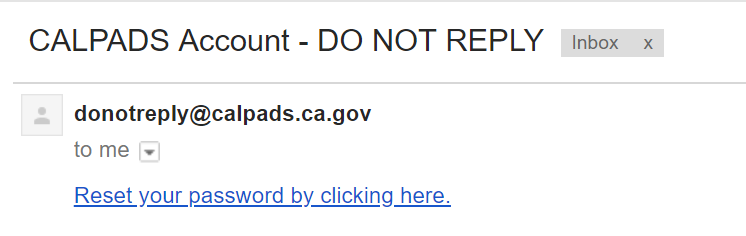
Step 9. User receives another email with a link to generate/reset their password.
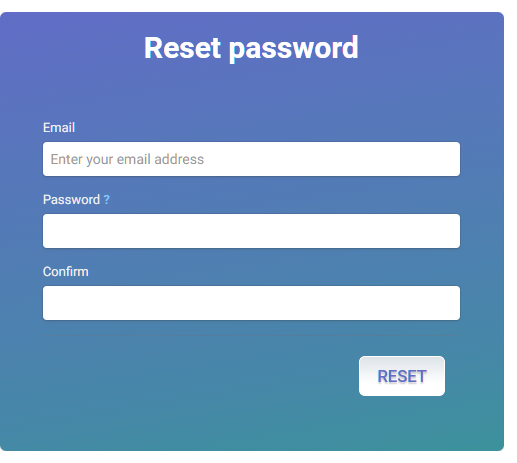
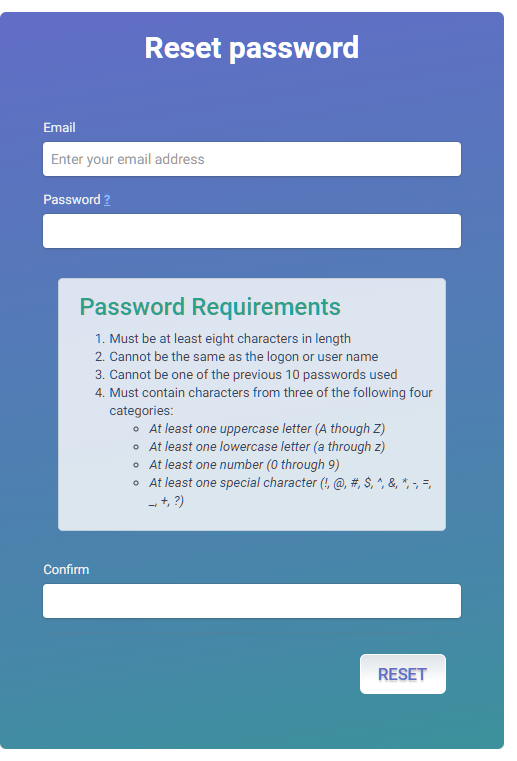
Step 10. The user is redirected to a CALPADS page where the email address and desired password for the account is established.
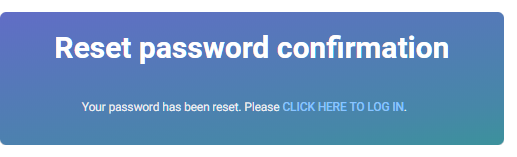
Step 11. A reset confirmation will appear with a link to the CALPADS site where the user can log in.
- NOTE: Users are expected to confirm email, reset password and log in the first time to CALPADS within 24 hours of user account creation. Otherwise, the email confirmation and set password link previously received will expire. The user will need to contact the LEA Administrator and request a new Email Confirmation.
Step 12. At the CALPADS log in screen, the user enters the email address as the Username and their recently created password, and then clicks on the Log in button.
Step 13. The user lands at the CALPADS home screen.